Monday, September 26, 2011

Cards for a Soldier

I had a friend ask me to make some cards for a soldier she has been corresponding with.  Of course I said I would do it!  Of course I had to make something a little more manly than I normally do.  

Here are two of the cards I created.

 This first card was using the stamp set The Open Sea.  The card base is Night of Navy and then the other two layers craft card stock from Papertrey Ink.   The second layer of craft card stock I used a sponge and Night of Navy ink to sponge over the card stock. Next I stamped on top of that.  I did the same technique on the circle punched craft card stock that was used on the layers.  I used some ribbon and stamped Hello in a window punch piece of craft card stock.

On this card I used some Red Riding hood paper and a layer of Night of Navy with white stars glued on it.  I then sent it through the Cuttle bug to emobss it.  I then stamped the Land of the Free stamp using Red Riding Hood and Night of Navy for the stars and words.  It was layered with a piece of blue and red that I distressed a little bit.

Have a good day!
Lulu

Sunday, September 25, 2011

Halloween Candy bag

Every year I create some sort of treat bag for my preschoolers.  This year I haven't had the time to create bags but put these together.  I used some Cello bags from Stampin Up filled them with Smarties.  I then used a scallop square punch and punched out some Halloween designer paper.  Then I used another color paper and used the 1 1/4 inch square punch.  I then stamped images using the Spooky Bingo Bits and punched it out using the 1 inch punch.

I think they turned out pretty cute, take a look and decide for yourself!


XoXo
Lulu

September Stamp Club

What a busy month!  Started back to work and have been busy making items for the classroom.  Finally got most of that done.  It sure was a great stress reliever to be able to go to Stamp Club and make some cards.  Here they are:


Have a great week!

XoXo
Lulu

Monday, August 22, 2011

The challenge continues

I finally finished making cards for all my Papertrey Ink stamp sets that I own.  That took longer than I thought it would take.  But I did get carried away making boards and other things for my classroom which I go back in one week.  UGH

The next part of my challenge is to use all of my Stampin Up stamp sets.  All these cards used Stampin Up materials.  If anyone is interested in buying any Stampin Up materials I did sign up to be a demonstrator so ask me how!

Stamp Set: Simply Said

Stamp Set: Birthday Bakery

Stamp Set: So many thanks

Ooops this was a Papertrey ink card but it never got posted

Stamp Set: Crazy for cupcakes

Stamp Set: Dasher


You can find all materials used at Stampin Up!

Have a great night!
XoXo
Am

August Stamp Club

The new In Colors from Stampin Up are just beautiful!  We used them on our cards for stamp club this month.  I'm in love!  Check out the cards below.


Hope everyone is having a great Monday!

XoXo,
Am

Sunday, August 7, 2011

July's Stamp Club

Here are the cards we made during stamp club! They are so cute!


I just loved making these cards. They are so colorful and fun.  While at stamp club, I decided I would become a demonstrator for Stampin Up.  If anyone is interested in hosting a workshop let me know!

XoXo
Am

For the teachers

There was a teacher stamp set on Papertrey Ink and of course I had to buy it.  This weekend I made some cards using this set.

 I had some card bases from the grab bag from Stampin Up the first one is a regular card size using 8 1/2 by 11 inch paper cut in half and folded.  The layer is kraft stock paper from Papertrey Ink and it was cut at 5 1/4 by 4 inches.  I stamped it with one of the apple bases from the stamp set called Teacher's apple.  I used real read from Stampin Up to stamp across the kraft cardstock paper then used glorious green ink from Stampin Up to stamp the stem and leave.  I stamped the sentiment in black and real read on white cardstock that was cut at 2 1/4 by 3 1/2.  The red is Real Red by Stampin up and it's cut at 2 1/2 by 3 3/4.  I used dimensional dots to give it a 3-D look.  The yellow bow on the top is some yellow ribbon I had left over.

This card is pretty much the same except that the card was a three inch by three inch card.  The kraft cardstock was then cut at 2 3/4 by 2 3/4 inch and stamped with a different apple base.  The real red layer on the rectangle was cut at 1 1/2 by 2 1/2 inch.  The white layer was cut at 1 and 2 1/4 inch.

I plan to use these cards to send home to parents through out the year.

XoXo
Am

Tuesday, July 12, 2011

Challenge to myself

I always buy these stamp sets but most of them sit up in my craft room and haven't even been touched. I woke up this morning, knowing I would be bored today decided to challenge myself to use all the stamp sets I have up in my craft room to make cards.

I got through one container of stamps I haven't touched.  I only got four more containers to go!  I'm not going to list the materials I used if you want to know send me an email and I'll tell you what I did and items used.


I'll post pictures of the other cards I make when I get to them this week!

XoXo
Am

Sunday, June 19, 2011

Happy Father's Day

Happy Father's Day to all you wonderful fathers out there and to those who took over the role when the biological father wasn't in the picture.

These pictures didn't turn out all that great but I made a father's day card for Phil's father and one for Hal the other day.


I took some premade cards to use as my base then took a piece of white paper and cut it 3 1/2 by 4 3/4 inches.  Then I cut the bottom at one inch and stamped Happy Father's Day in Chocolate Chip.  For the ties, I used my Stampin Up markers to color each one a different color then I embossed the bottom half with polka dot folder.  I took a piece of green scrap paper I had laying around and used the VersaMark ink pad to stamp Happy Father's day then took some twine and wrapped it on the green piece of paper.

I cut out Dad and Hal at one inch on the plantin schoolbook cartridge and used two way glue to attach it to the green piece of paper.  I think the cards turned out great, sadly the pictures did not do them justice!

Happy Father's Day!

XoXo
Amber

Sunday, June 5, 2011

May's Stamp Club

Here are some pictures of the cards we made during May's stamp club.  They turned out pretty cute!


Enjoy the rest of your weekend!
XoXo
Am

Graduation

Most of the children in my preschool classroom are graduating this month.  It's been a long journey but we have all grown together and I'm ready to send them on their way to Kindergarten next fall.


I was thinking of making some cards for them but didn't want to spend a lot of time making them either.  Then I remember I had these 3 inch by 3 inch cards that came in my grab bag from Stampin Up.  So I pulled them out and figured this would work out well. The grab bags came with some other cardstock cuts so I figured I would use some of it as well.


I'm not sure what color the red is but it's a 3 by 3 inch card. Then I cut a piece of white cardstock at 2 3/4 by 2 3/4.  I used elementary alphabet builder wheel stamp with Green Galore.  I had to do four lines to fill up the square.  Then I took a piece of green cardstock that was in the grab bag, they were already cut and fit perfectly across my card.  Then I punched out an oval, inked the edges in Real Red then used Papertrey Ink stamp set to stamp Happy Day in Real Red.  I decided it needed a little bling so I used Imaginisce I-Rock tool and added some gems to it.

Graduation is next Saturday so I better get the rest of these cards done :0)

Have a fantastic day!
XoXo
Am

Wednesday, May 18, 2011

Happy Birthday Sinu!

Tomorrow is my friend's birthday.  I saw this post about making a Z-Fold card and thought I'd give it a shot.  I also made a box and put five different cards in it for Sinu.  I hope she likes it :0)

 The card base is cut at 4 1/4 by 11 in a light green color then I scored it at 2 3/4 and 5 1/2.  I then used my Imagine and used the Lori's Garden cartridge to print out the yellow pattern paper.  The larger piece is cut at 5 1/4 by 4 and the two smaller pieces are cut at 2 1/2 by 4.  Then I created the butterfly and stem of flowers from the Lori's Garden cartridge. I decide to print and cut the flower in layers and then put them together. I did add 3D dots on the flower leaves so they pop up. 

This is what the inside of the card looks like.  I cut out a 2 1/2 and a 2 1/4 inch rectangle off one of the new cartridges that came with the E2.  I then stamped a little birthday saying on the creamed color of paper.   I did jazz it up a little bit by adding some silver ribbon and some pearls on the butterfly.  I think it turned out cute!

For her present I created this box at Stamp Club last month and thought I'd fill it up with some cards.  All these cards that are shown below are created using different Stampin Up materials. I'm not going to list everything I did for these cards but wanted to show you some pictures.


Happy Birthday Sinu! I hope you have a wonderful day!

XoXo
Am

Saturday, May 14, 2011

Happy Together

Phil had been complaining because I didn't get a card made for his birthday.  The truth is I had been really sick and just didn't get around to it.  When I was feeling better I made this quick and easy card for him. I think it turned out great.

I used all Papertrey Ink paper and the stamp set of course was from Stampin Up called Happy Together. I cut the Enchanted Evening paper at 8.5 by 5.5 and folded it in half.  Then I used some Simply Chartreuse paper and distressed it a little to look like grass, I cut two pieces at one inch.  Then I used some brown at the bottom and tied on Simply Chartreuse ribbon and a piece of white ribbon in between the two Simply Chartreuse bows.

I stamped the saying Happy Together in Real Red by Stampin up and a couple brown flower buttons on the end.

I think it turned out pretty neat for a quick simple card in five minutes. :0)

Have a good weekend!
Am

Sunday, April 24, 2011

Win an Cricut Expression 2?

For anyone out there.  Everyday Cricut is giving us all the lovely chance to win a E2!  How exciting.  Head on over to their website: Everday Cricut!  Maybe you'll be the lucky winner!

XoXo
Amber

Saturday, April 23, 2011

Nothing beats Stamp Club Saturdays

So it's been awhile since the last time I posted on here.  I guess life has just gotten a little too busy to be making cards.  But today was Stamp Club so I headed over to Christina's to make some cards.  These cards are so cute. I changed the saying on a couple of my cards so I could use them for Mother's Day.


I think they all turned out really cute! And of course I had to buy the stamp set so I could create others just like these! :0)

I hope you all have a happy Easter!

XoXo
Am

Sunday, March 13, 2011

Great Weekend

This weekend was full of fun.  Friday night, Juan, Phil and I went out to dinner and out to a friends birthday party.  Saturday Phil and I did some shopping and went to see the eye doctor.  That night we went out with some friends that we haven't seen in awhile.  Today, I was able to get some things done for a friend in my craft room and create some cards for all the birthdays coming up in March.


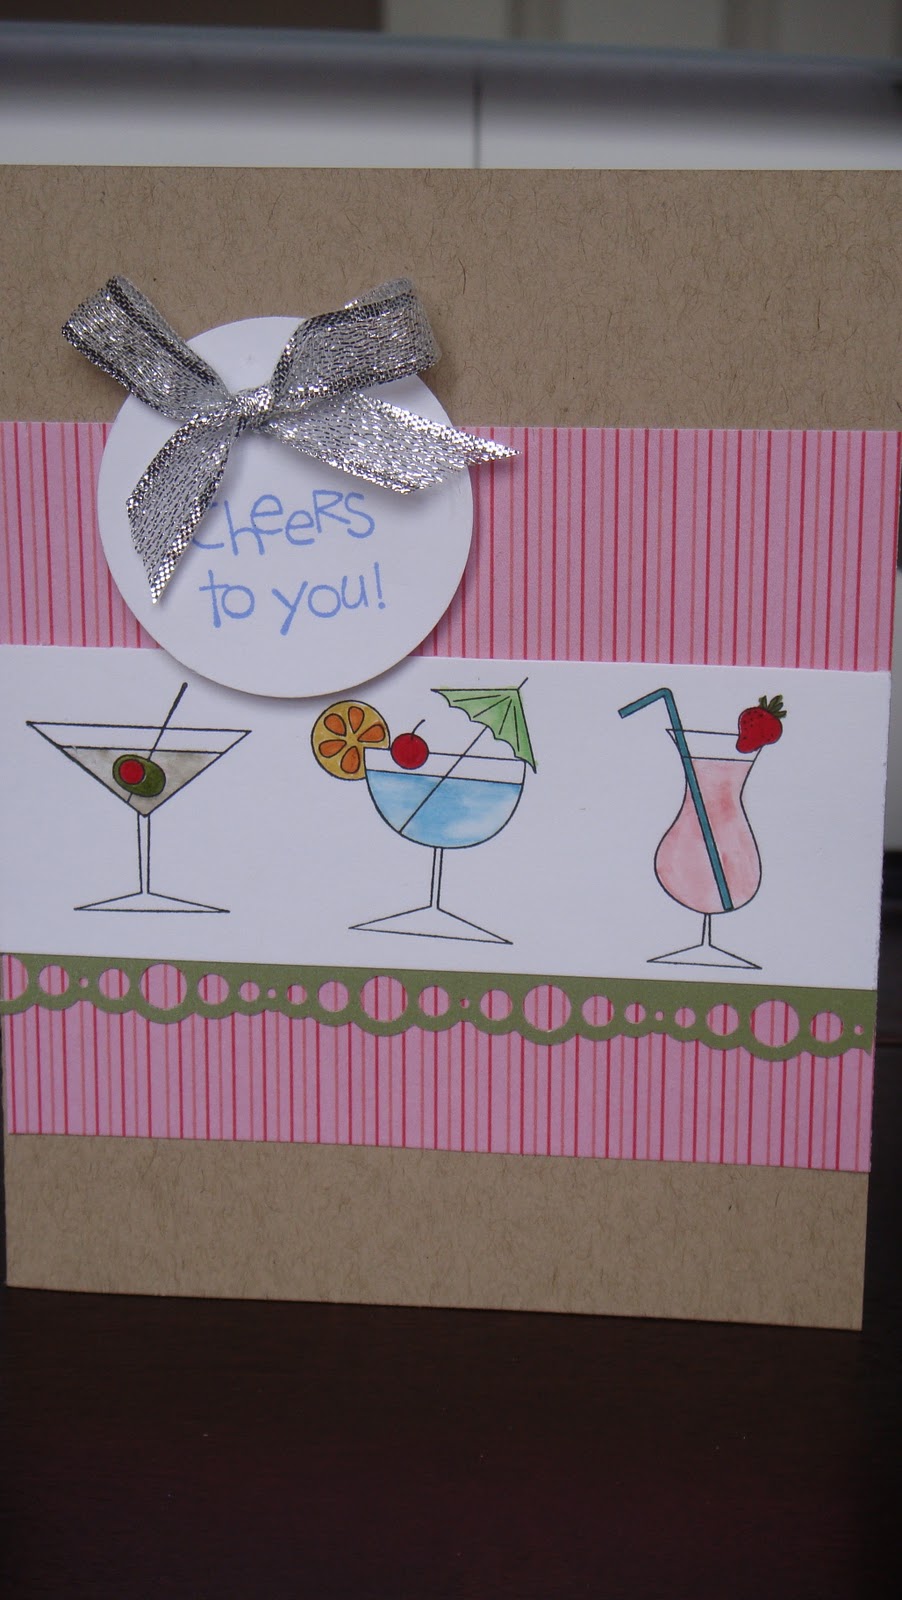
This first card is for my friend Barbara, today was her birthday.
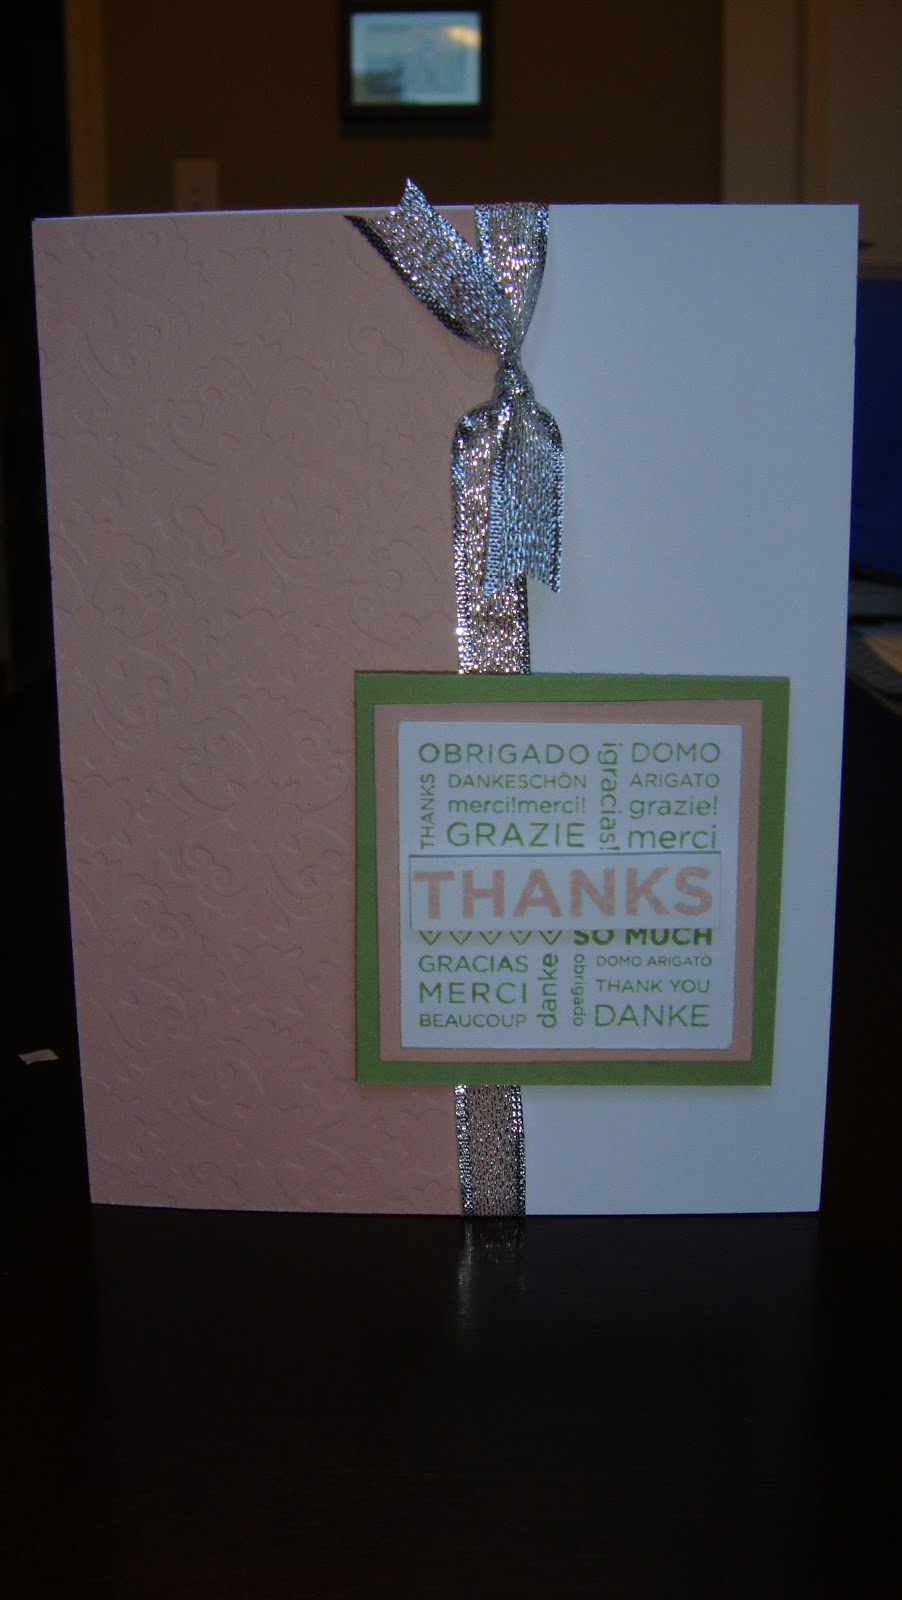
I really like this stamp set from Stampin Up.  It's called Cheers to you.  It makes great birthday cards.  The base of my card is from Papertrey ink and it's called Kraft card stock and it was cut at 5 1/2 by 8 inches.  The pink striped paper was some scrap I had laying around.  The green came from the shimmer pack from DCVW.   I border punched it with the Ek Success bubbles punch. I punched the circle out using 1 3/4 circle punch from Stampin Up and the silver ribbon is from Papertrey ink.

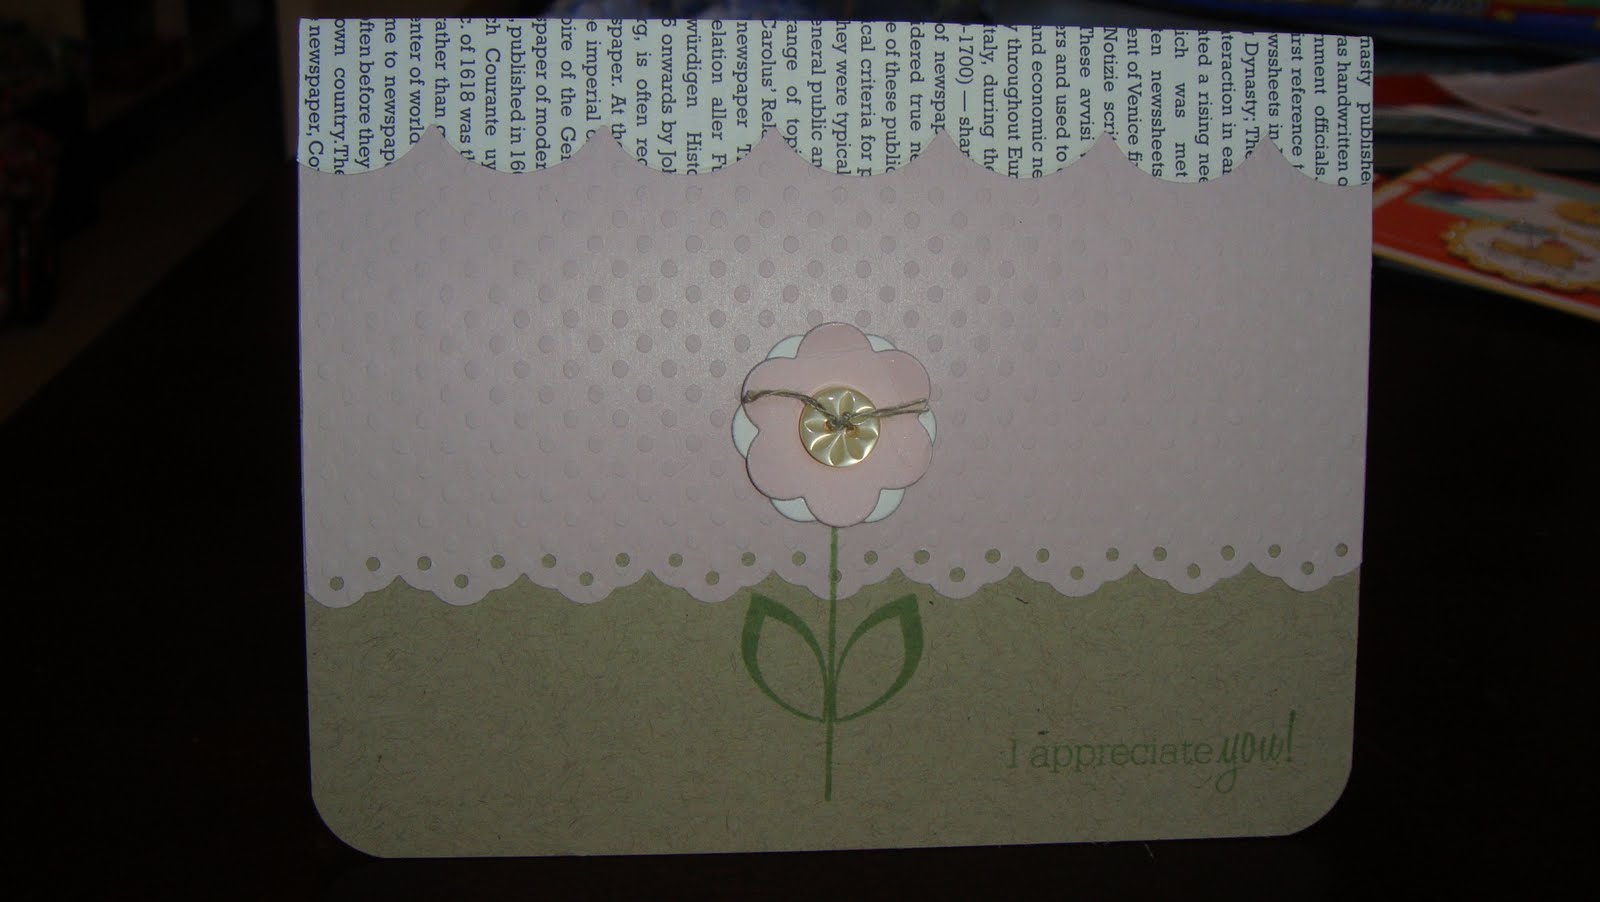
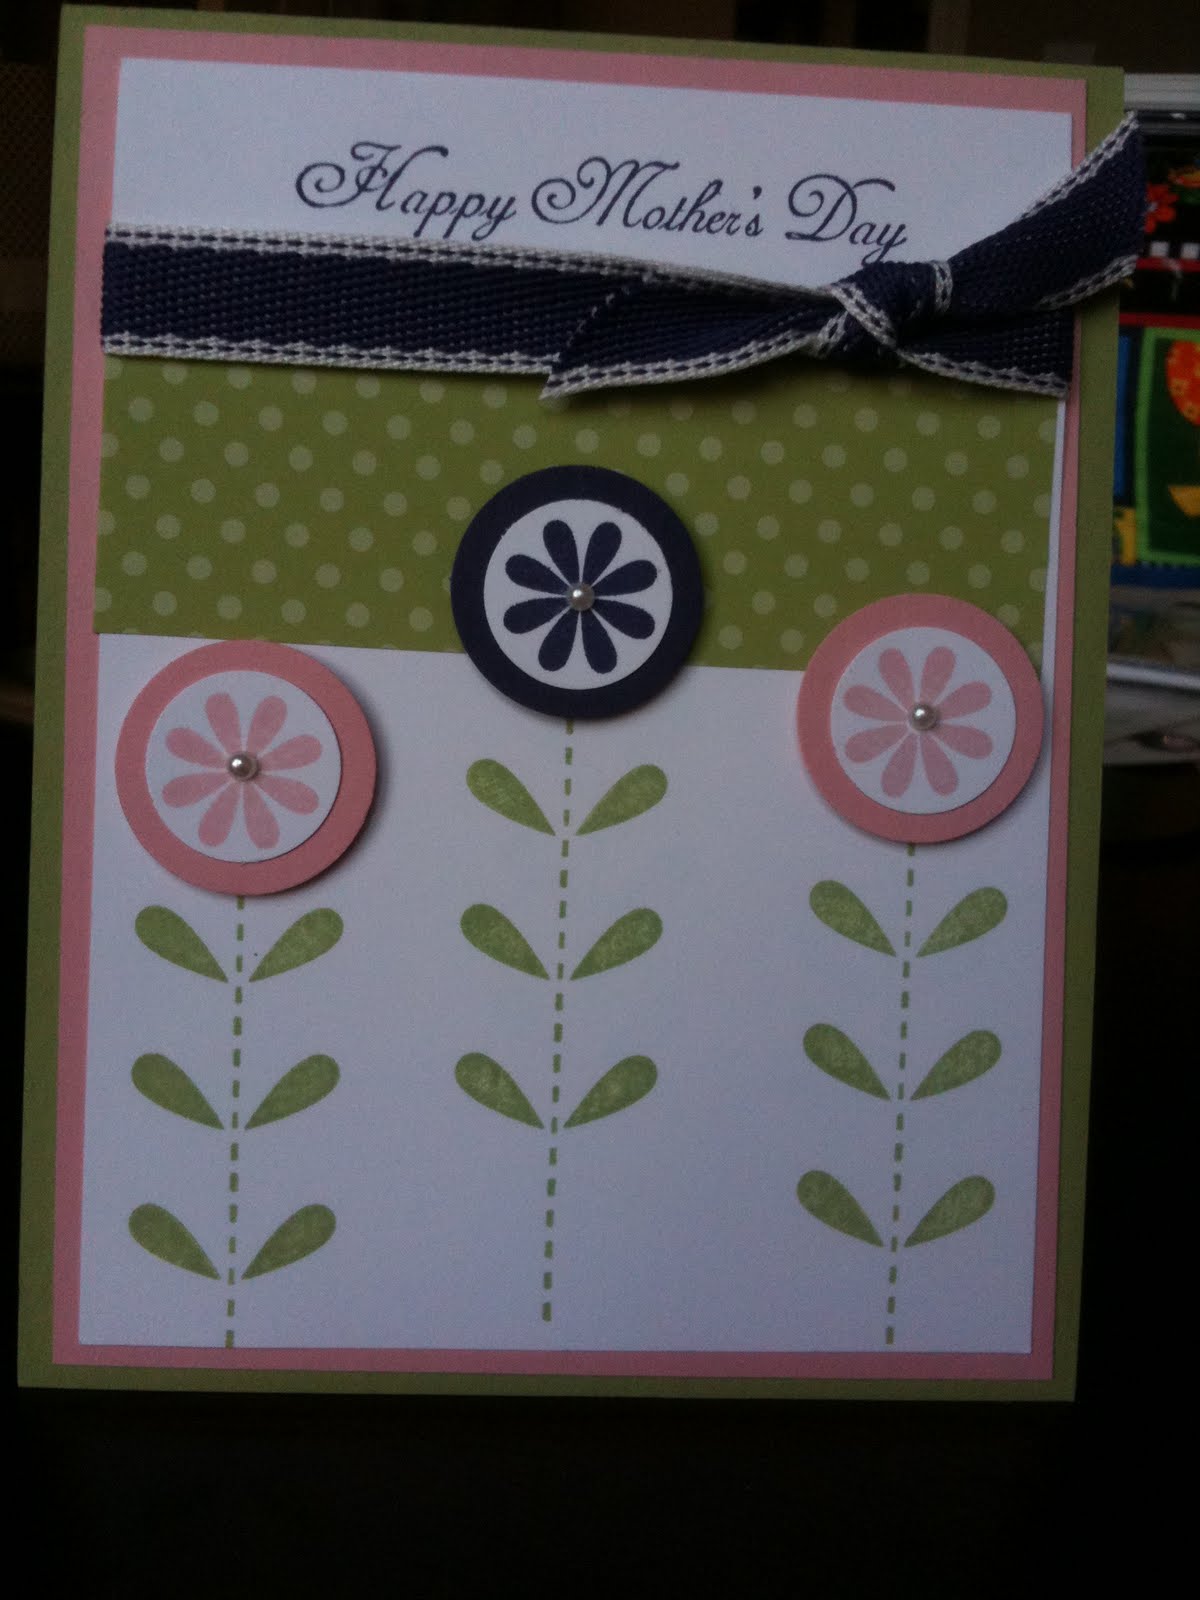
This card is for my Grandma Williams.  I used all Stampin Up products here.  The base of the card is Blashful Blue and it is cut at 4 1/5 by 9 inches. The brown color is from the Neutrals Collection.  I used the Build a Blossom stamp set and punch and I can't remember the colors I used for the green and pink.  I used a brad from Stampin Up to be the center of my flower.

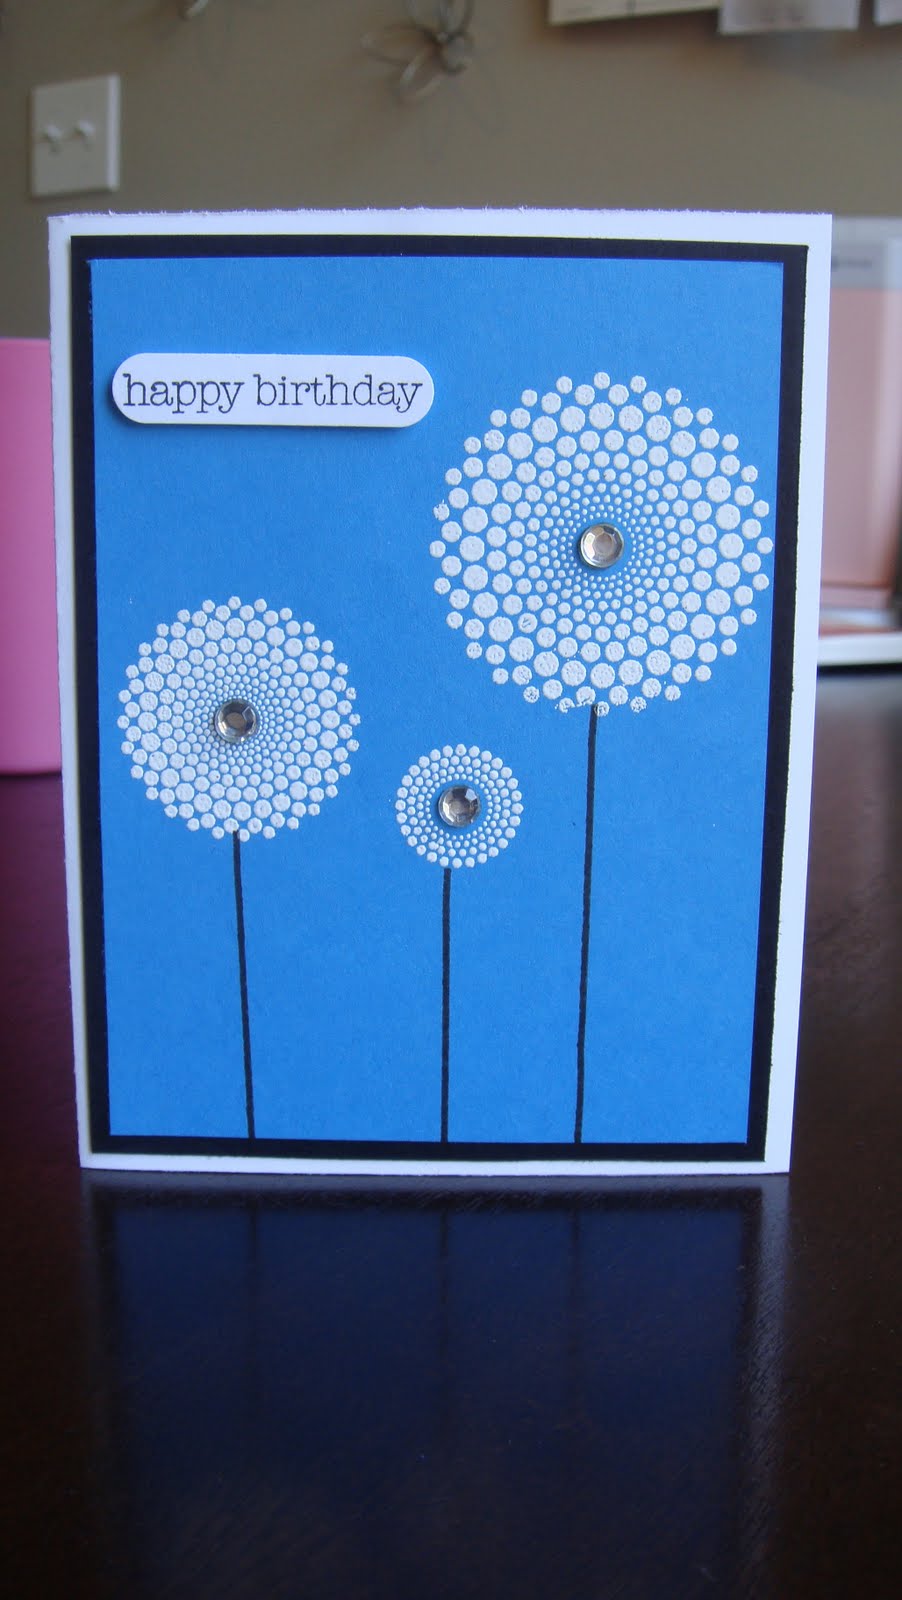
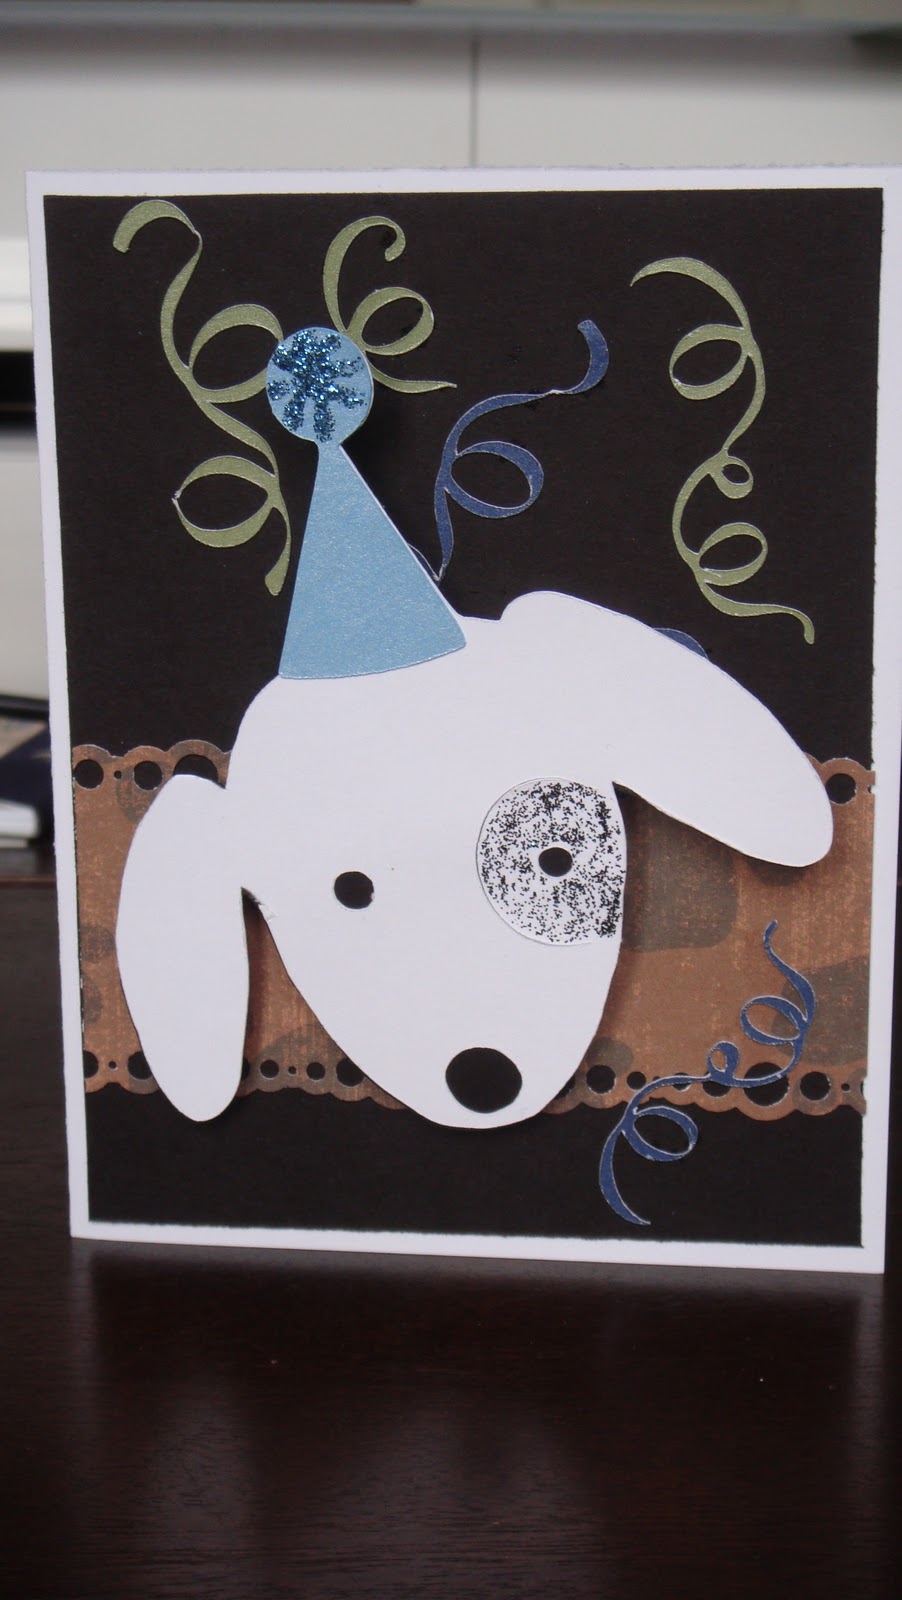
This card is for Zach! His birthday is in a week.  I used Papertrey Ink white and black paper.  My card base is cut at 5 1/5 by 8 inches.  The printed brown paper has dog paws on it and I again used my Ek Success bubbles punch on it. I think that is my new favorite punch.  The dog was cut from the Celebrations Cartridge and I cut him at 4.5. I used the black out feature to get the first layer then did it again for the white layer.  I jazzed it up with some Stickles on his eye and hat.

Happy Birthday to Zachary, Grandma Williams and Barbara!

I hope you all had a wonderful weekend!

XoXo
Am